# Multi-Site
Statamic's multi-site capabilities are designed to manage variations of a **single site**, and/or different sections of a single site running on one or more domains or subdomains. It can be used to manage translations, country-specific versions of a company site, put an area such as `support` or `resources` on a subdomain, and other similar use cases. _It is not intended to be used for multi-tenant applications_ running completely separate sites.
## Overview
Statamic can be configured to handle multiple "sites". A site is a way of managing a localized version of your content - whether another language, region, or even company/brand (think Proctor & Gamble).
Each site can have different base URLs:
- domains: `hello.com` and `bonjour.com`
- subdomains: `example.com` and `fr.example.com`
- subdirectories: `example.com` and `example.com/fr/`
If you're looking to run many independent websites from a shared codebase, multi-site is not the right tool. We are intentionally opinionated here, and you should explore our [Platform Pricing](https://statamic.com/pricing/platform) model
::: tip
Every Statamic install needs at least one site. Building zero sites is a bad way to build a website and clients will probably challenge your invoices.
:::
### Converting existing content to multi-site
The simplest way to convert existing content to a multi-site friendly structure is to run the automated command:
``` shell
php please multisite
```
Read more on [converting to a multi-site setup](/tips/converting-from-single-to-multi-site.md).
## Configuration
### Enabling multi-site
First, enable `multisite` in your `config/statamic/system.php`:
``` php
'multisite' => true,
```
### Adding new sites
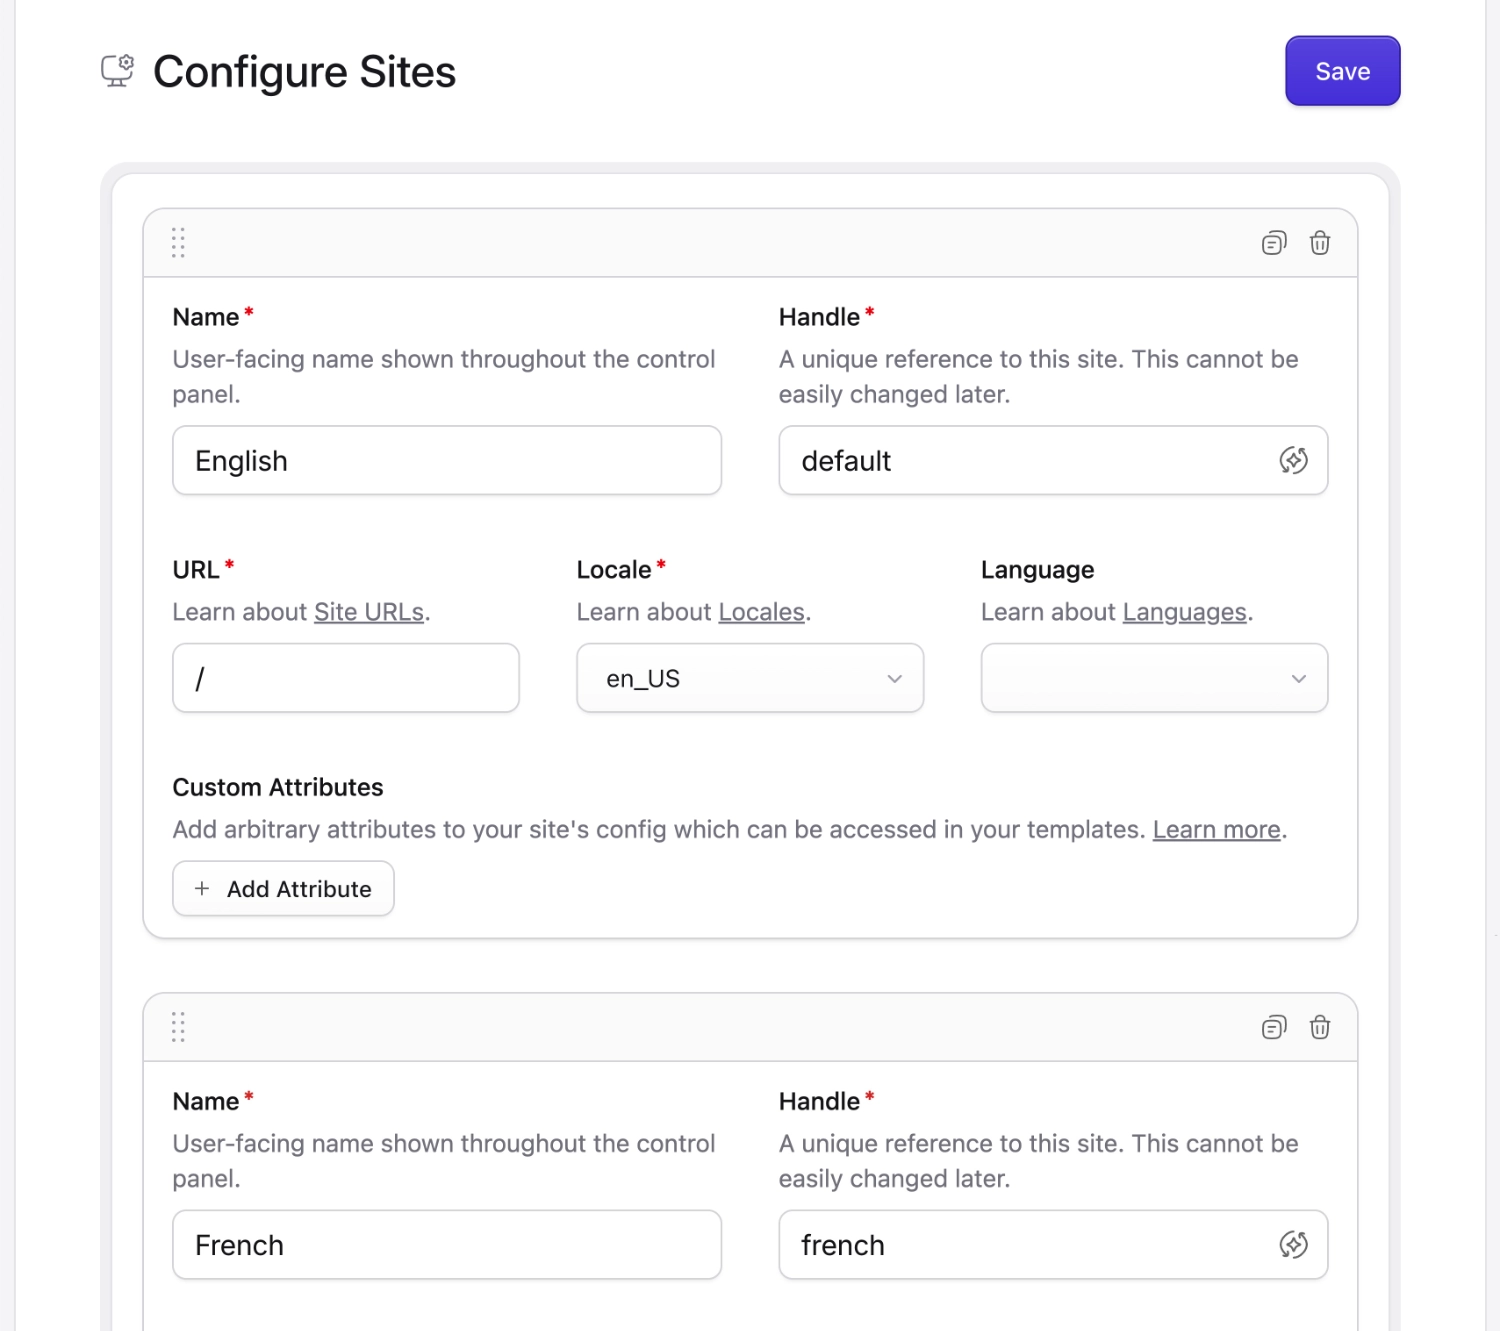
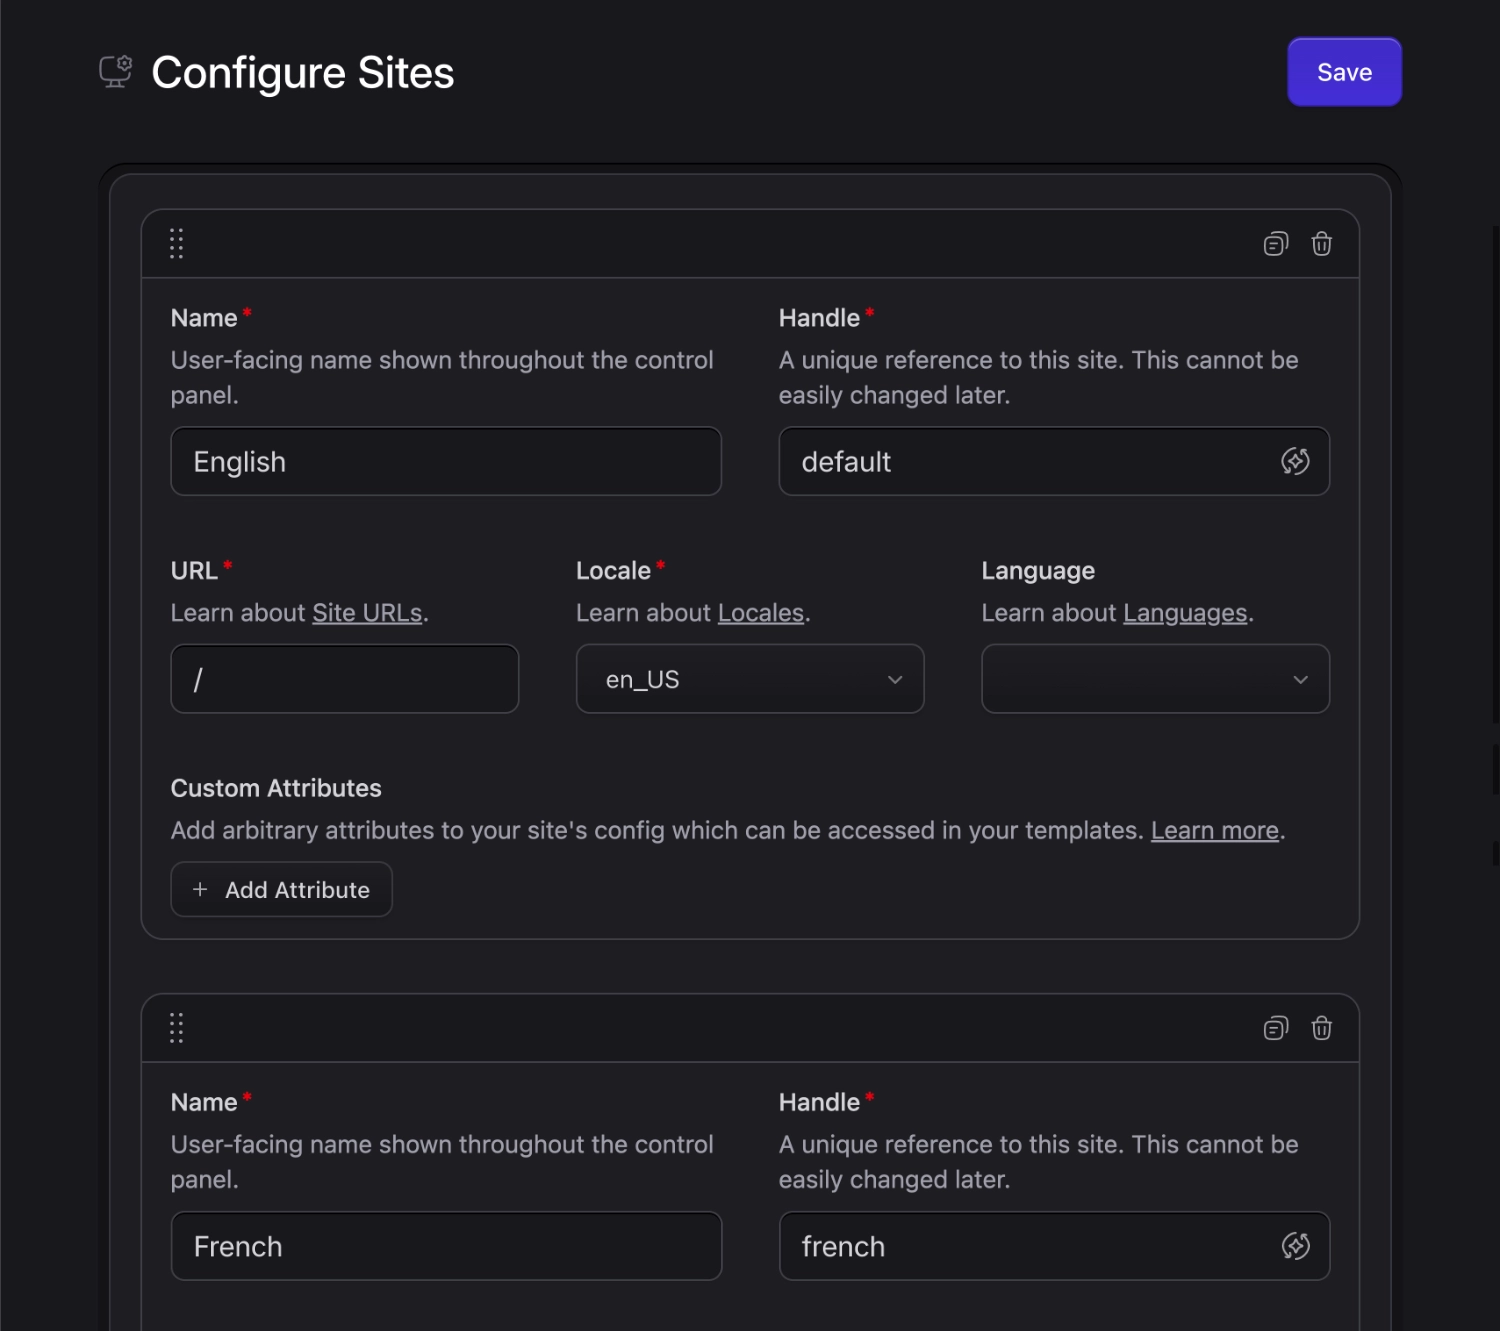
Next, you can add new sites through the control panel by clicking the Site menu item in the sidebar:
Or directly in your `resources/sites.yaml` file:
``` yaml
default:
name: First Site
url: /
locale: en_US
second:
name: Second Site
url: /second/
locale: en_US
```
## Available options
Let's look at a full site configuration, and then we'll explore all of its options.
``` yaml
# resources/sites.yaml
en:
name: English
url: /
locale: en_US
lang: en
attributes:
theme: standard
```
### Handle
Each site is keyed by its `handle`, which is important for directory structure, as well as referencing sites in collection configs, etc. throughout your site. Changing this is non-trivial, and you should be careful if you already have established content in this site. Read more about [renaming sites](#renaming-sites).
``` yaml
en: # <- This is your site handle
name: English
```
### Name
Each site has a `name`, which is a display-friendly representation of your site's name mostly seen within control panel UI. Changing this does not affect content relations.
``` yaml
en:
name: English
```
::: tip
You'll notice the default site dynamically references a [config variable](/variables/config.md), but feel free to change this!
``` yaml
default:
name: '{{ config:app:name }}'
```
:::
### URL
Each site requires a URL to define the root domain Statamic will serve and generate all URLs relative to. The default `url` is `/`, which is portable and works fine in most typical sites. Statamic uses a little magic to work out what a full URL is based on the domain the site is running on.
:::best-practice
It can be a good idea to change this to a **fully qualified, absolute URL**. This ensures that server/environment configurations or external quirks don't interfere with that "magic".
```yaml
en:
# ...
url: '{{ config:app:url }}'
fr:
# ...
url: '{{ config:app:url }}/fr/'
```
By default, this is linked to your `APP_URL` environment variable, which allows you to control the exact URL by environment:
```env
# production
APP_URL=https://mysite.com
# development
APP_URL=http://mysite.test
```
:::
### Locale
Each site has a `locale` used to format region-specific data (like date strings, number formats, etc). This should correspond to the server's locale. By default, Statamic will fallback to your app's locale.
### Language
Statamic's control panel has been translated into more than a dozen languages. The language translations files live in `resources/lang`.
You may specify which language translation to be used for each site with the `lang` setting. If you leave it off, it'll use the short version of the `locale`. e.g. If the locale is `en_US`, the lang will be `en`.
``` yaml
de:
name: Deutsch
locale: de_DE
# Lang not needed, as `de` is implied
de_CH:
name: 'Deutsch (Switzerland)'
locale: de_CH
lang: de_CH # We want the `de_CH` language, not `de`
```
Note that both Statamic and Laravel don't ship with frontend language translations out of the box. You have to provide your own string files for this. There is a great package called [Laravel Lang](https://github.com/Laravel-Lang/lang) containing over 75 languages that can help you out with this.
### Additional attributes
You may also include additional arbitrary `attributes` in your site's config, which can later be accessed with the [site variable](/variables/site.md).
``` yaml
en:
# ...
attributes:
theme: standard
```
::tabs
::tab antlers
```antlers
```
::tab blade
```blade
```
::
In Blade, you can also use the `attribute()` method, which supports dot notation and a fallback value for attributes that may not be set:
```blade
```
:::tip
Nothing fancy happens here, the values are passed along "as is" to your templates. If you need them to be editable, or store more complex data, you could use [Globals](/globals.md).
:::
## Text direction
Text direction is automatically inferred by Statamic, based on the [language](#language) of your configured site.
For example, most sites will be `ltr`, but Statamic will automatically use `rtl` for languages like Arabic or Hebrew.
If you need to reference text direction in your front end, you can make use the [site variable](/variables/site.md):
::tabs
::tab antlers
```antlers
```
::tab blade
```blade
```
::
## Renaming sites
If you rename a site's [handle](#handle), you'll need to update a few folders and config settings along with it. Replace `{old_handle}` with the new handle in these locations:
**Content folders**
- `content/collections/{old_handle}/`
- `content/globals/{old_handle}/`
- `content/trees/{old_handle}/`
**Collection Config YAML Files**
``` yaml
# content/collections/{collection}.yaml
sites:
- {old_handle}
- de
- fr
```
## Permissions
Within the Control Panel, you will not be able to access items in a particular site if you do not have permission.
You may grant permission for any of your sites by adding an `access {site_handle} site` to the appropriate role.
For example:
```yaml
permissions:
- edit blog entries
- access english site # [tl!++]
- access french site # [tl!++]
```
[Read more about permissions](/permissions.md)
## Per-Site Views {#views}
[Views](/views.md) can be organized into site directories.
If a requested view exists in a subdirectory with the same name as your site [handle](#handle), it will load it instead. This allows you to have site-specific views without any extra configuration.
``` yaml
# resources/sites.yaml
site_one:
# ...
site_two:
# ...
```
``` files theme:serendipity-light
resources/views/
site_one/
home.antlers.html
home.antlers.html
page.antlers.html
```
For example, given `template: home`, Statamic will load `site_one/home` because that view exists in the subdirectory. If you were to have `template: page`, it would load the one in the root directory because there's no site-specific variant.
## Template snippets
Here are a few common features you'll likely need to template while building a multi-site.
### Building a site switcher {#site-switcher}
This will loop through your sites and indicate the current site as the active one. Check out all the [available variables inside the `sites` loop](/variables/sites.md).
::tabs
::tab antlers
```antlers
{{ sites }}
{{ handle }}
{{ /sites }}
```
::tab blade
```blade
@foreach ($sites as $switcherSite)
$switcherSite->handle == $site->handle
])
href="{{ $switcherSite->url }}"
>{{ $switcherSite->handle }}
@endforeach
```
::
### Declaring the page language
Indicate the current language of the site by setting the `lang` attribute on your `` tag (most likely in your layout view), or the container element around translated content if the page mixes and matches languages.
::tabs
::tab antlers
```antlers
```
::tab blade
```blade
```
::
## Static caching
If your multi-site should use static caching, you will also need to add additional config parameters and different server rewrite rules. Please refer to the related section of the [static caching documentation](/static-caching.md#multisite) for the correct settings.
## Enabling fields
By default, your existing fields won't be enabled for multi-site editing. To enable a field to be editable within another site, navigate to the field and click the globe icon (Localizable).