

Deploying Statamic to Netlify
Netlify is a Jamstack service and cloud provider that lets you deploy your Statamic site statically with blazing fast performance using its Edge CDN.
Please note that by hosting your site statically with a service like Netlify or Vercel, you can't access the Control Panel in production and are not able to use dynamic features like Statamic's built-in forms or random sorting in your templates.

Deployments are triggered by committing changes to your Git repository. Alternatively, you can also upload the locally generated files from Netlify's dashboard via drag and drop.
Prerequisites#
While Netlify supports PHP versions from 7.4 through 8.3, it defaults to PHP 8.0. You can specify the PHP version using the PHP_VERSION environment variable.
- A Netlify account
- An account with one of Netlify's supported Git providers
- Have the
statamic/ssgpackage installed and set up in your project - Make sure you don't need or use any dynamic features, like forms or random sorting.
- To make things easier, add a new script to your project's
composer.jsonfile with the following commands:
"scripts": {
    "build": [
        "npm run build",
        "@php -r \"file_exists('.env') || copy('.env.example', '.env');\"",
        "@php artisan key:generate",
        "@php please ssg:generate"
    ],
    // ...
}
Feel free to customize this to fit your needs. Netlify automatically installs npm and composer dependencies. So there is no need to manually run npm ci or composer install.
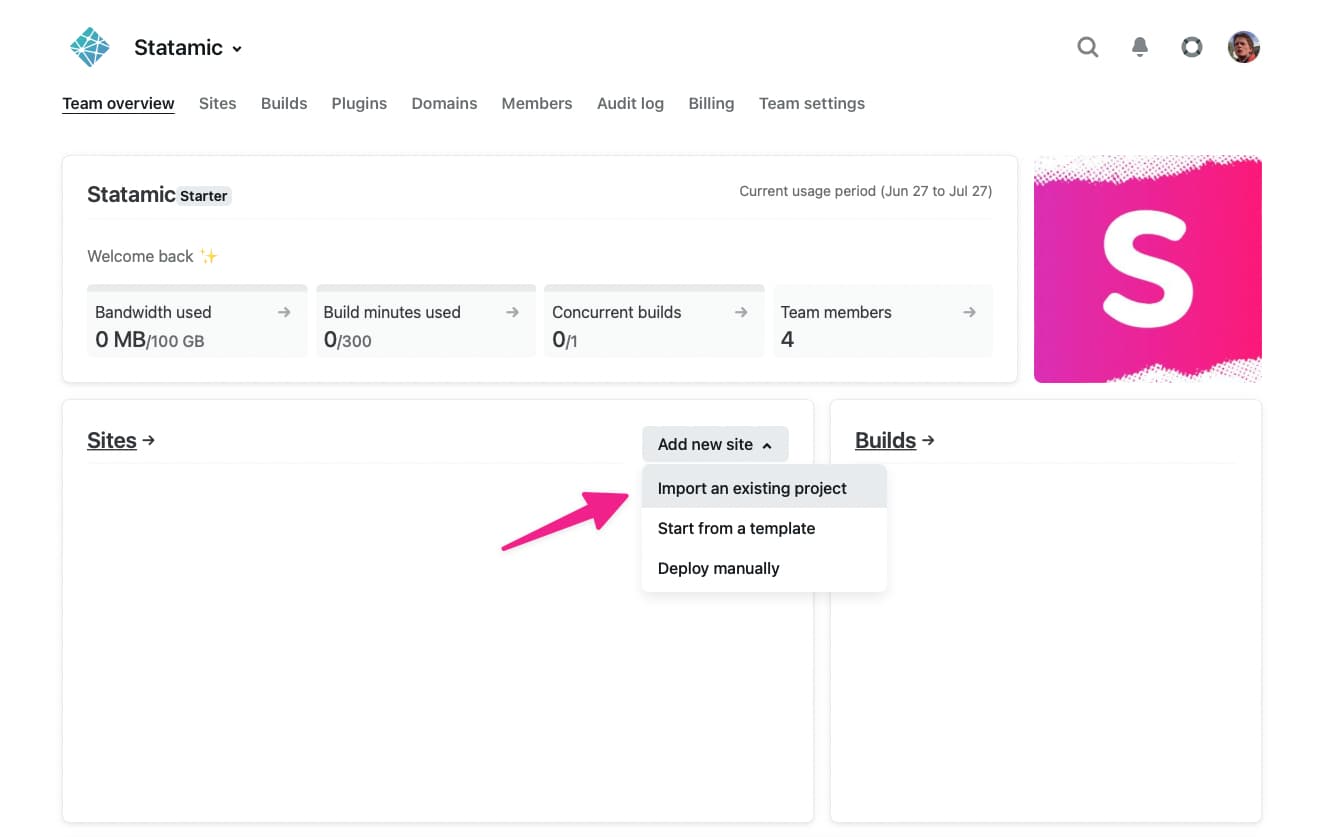
Creating a New Site#
To get started add a new site to your account. In this walk-through we'll assume you already have an existing project that you want to import since it's the most common use-case.
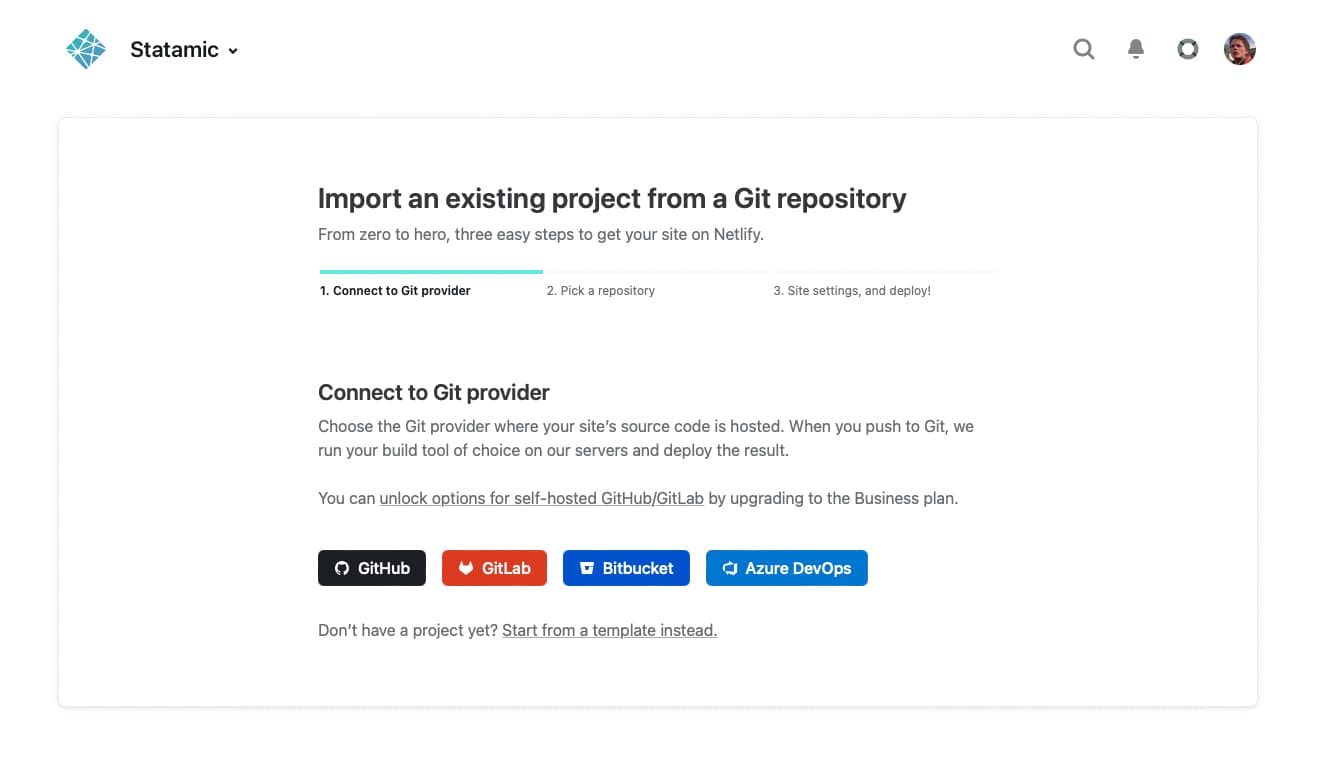
Next, you will need to authorize Github (or another supported source control provider). This is a one-time process that allows you to quickly deploy new sites from this account.
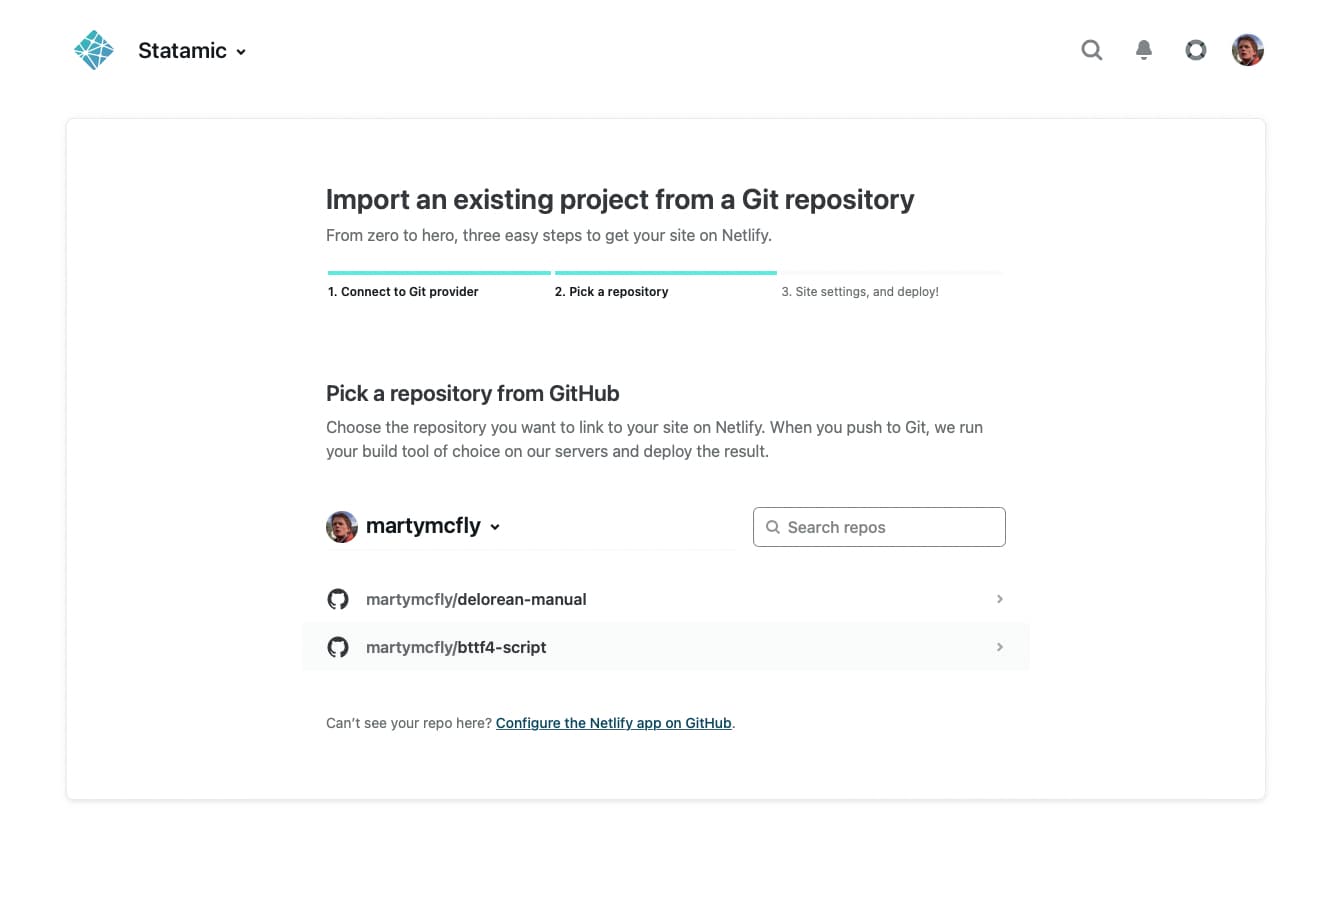
After you connected to your Git provider, pick the repo of the project you want to deploy to Netlify. So choose wisely 🧙♂️
The next step is to configure your site's settings and deployment configuration.
- Choose the branch you want to deploy from. This could be the
mainbranch or something likeproduction, depending on your Git workflow. - Leave the base directory input empty, unless your Statamic project is part of a monorepo or lives in a subfolder.
- Use
composer buildfor the build command if you set up yourcomposer.jsonlike mentioned above.- Otherwise just use
php please ssg:generate
- Otherwise just use
- Set the publish directory to
storage/app/static - Add
APP_KEYenv variable, by runningphp artisan key:generatelocally, and copying from your.env- ie.
APP_KEYyour-app-key-value
- ie.
- Add
APP_URLenvironment variable after your site has a configured domain- ie.
APP_URLhttps://thats-numberwang-47392.netlify.com
- ie.
Instead of doing all of this manually, you can also use a netlify.toml file at the base of your project. Netlify automatically detects the file and sets everything up for you. Feel free to use this one as a reference or starting point.
More about file-based configuration in Netlify's docs.

That's it! ✅
Depending on how large and complex your project is, the deployment might take a few seconds or minutes.
After this is done, you can visit your site via a URL provided by Netlify. It looks similar to this https://thats-numberwang-47392.netlify.app.
Be sure to have a look at Netlify's docs on custom domains, enabling HTTPS, and how Netlify forms work.
SSG configuration for Netlify#
After you have installed the statamic/ssg package, you can publish its configuration with the following command:
php artisan vendor:publish --provider="Statamic\StaticSite\ServiceProvider"
This allows you to customize the behaviour of the package.
Let's say you have additional folders and files that you need for your site. Just add them to the copy array:
'copy' => [
    public_path('css') => 'css',
    public_path('js') => 'js',
    public_path('assets') => 'assets',
    public_path('favicon.ico') => 'favicon.ico',
],
Storing Assets in S3#
If you are storing your assets in an S3 bucket, the .envs used will need to be different to the defaults that come with Laravel, as they are reserved by Netlify. For example, you can amend them to the following:
# .env
AWS_S3_ACCESS_KEY_ID=
AWS_S3_SECRET_ACCESS_KEY=
AWS_S3_DEFAULT_REGION=
AWS_S3_BUCKET=
AWS_URL=
Be sure to also update these in your s3 disk configuration:
// config/filesystems.php
's3' => [
    'driver' => 's3',
    'key' => env('AWS_S3_ACCESS_KEY_ID'),
    'secret' => env('AWS_S3_SECRET_ACCESS_KEY'),
    'region' => env('AWS_S3_DEFAULT_REGION'),
    'bucket' => env('AWS_S3_BUCKET'),
    'url' => env('AWS_URL'),
],
Using SEO Pro#
By default, the SEO Pro addon generates the sitemap.xml and humans.txt files dynamically and on the fly.
For both files to be part of your generated site, explicitly add their URLs to the array of the Additional URLs section in the configuration file:
# config/statamic/ssg.php
'urls' => [
    '/sitemap.xml',
    '/humans.txt',
],
