

How to Install Statamic on Laravel Forge
A full tutorial on how to install Statamic with Forge's 1-Click Installer. For this walk-through, we'll assume you have a Forge account with a server provisioned.
The Laravel team have made installing Statamic exceedingly simple. Follow these ... steps, and you'll have a Statamic site running that you can log right into.
If you already have a Statamic site built, you should switch over to the Deploying Statamic on Laravel Forge guide.

1. Create a new site#
Make sure to select "Statamic" from the "New site" dropdown. Then click on the "Use a starter kit" tab.
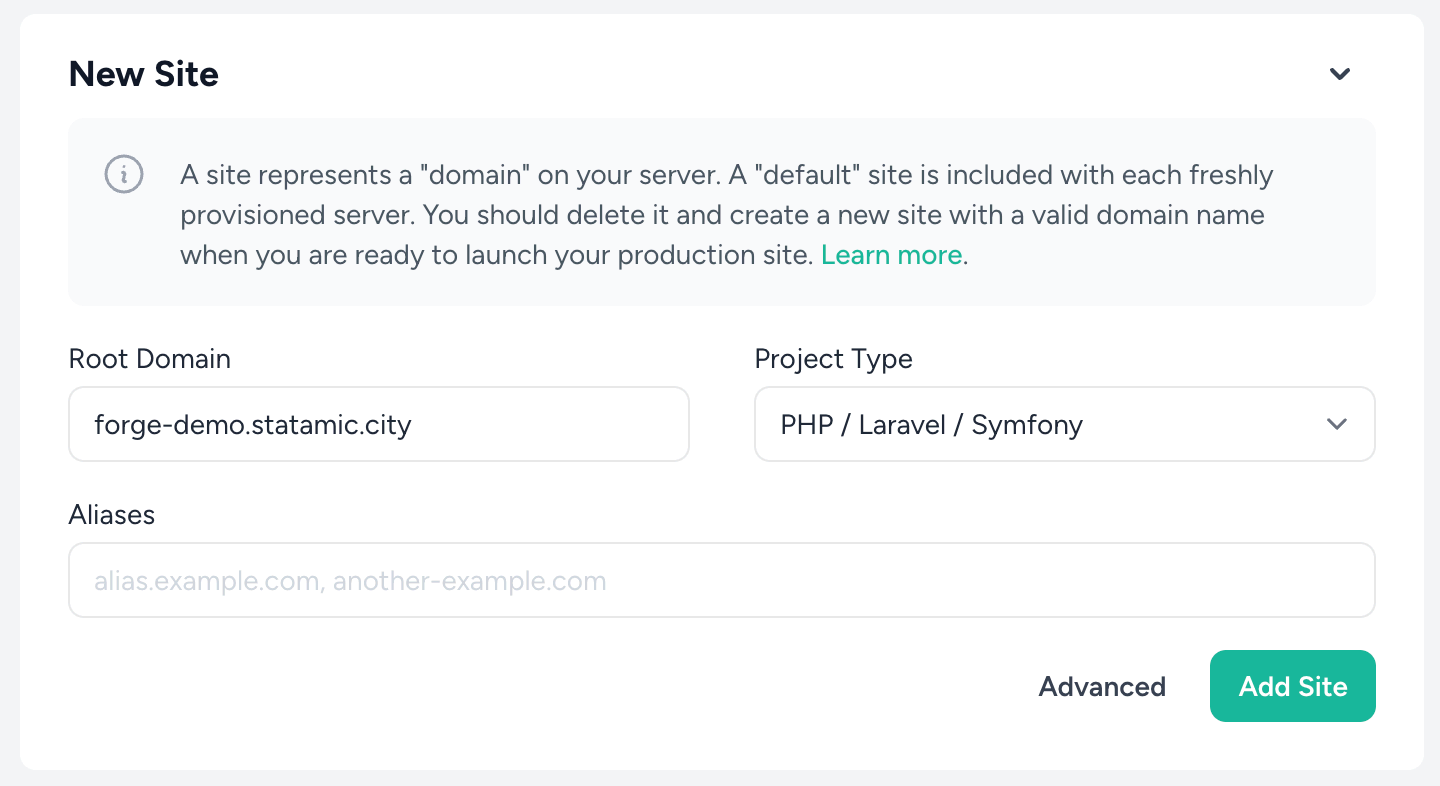
You'll first be asked to configure a domain. If you don't have one yet, you can use a .on-forge.com subdomain.
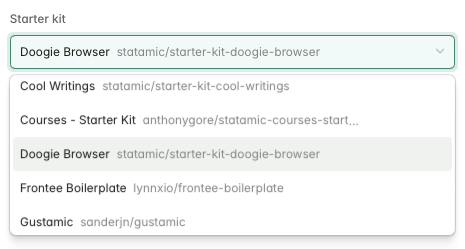
Then, you can pick which Starter Kit you'd like to use. Only free/open-source Starter Kits are available through this workflow, so if you'd prefer one of the paid/commercial kits, you'll need to follow the local install and Deploy on Laravel Forge guides.
Finally, set up an email and password and click "Create site".
After creating your site, Forge will take a few seconds to configure the necessary services, like Nginx and PHP-FPM, then you'll be able to visit your new site.
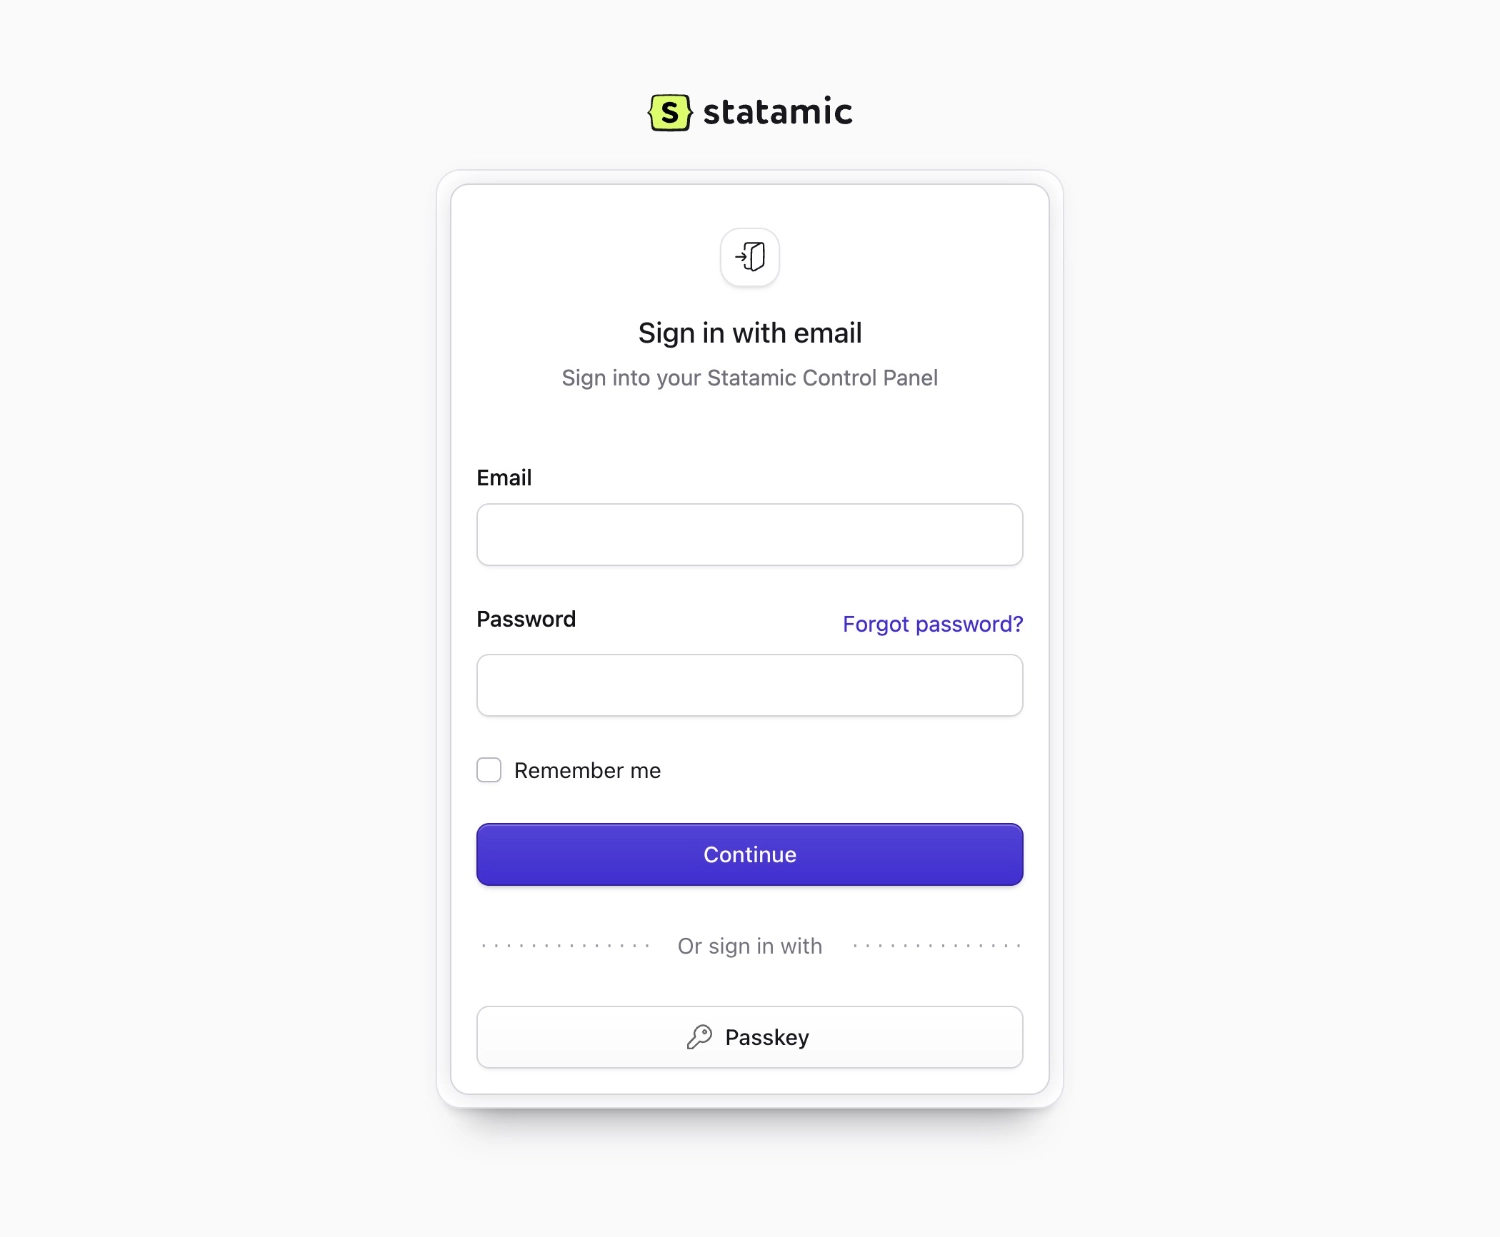
2. Sign in to your new Statamic site#
Assuming you've pointed your DNS to this server, all that's left is to head to yourdomain.com/cp and sign in to the Statamic Control Panel. The site is yours.
/cp you've just earned 200 XP!